
How to make YouTube thumbnail in 4 steps
- Open Canva
- Find a suitable template
- Customize your thumbnail
- Download your tailored thumbnail
To learn details keep reading.
Creating captivating YouTube thumbnails is key to reaching more viewers and growing your channel. Your thumbnail is the first impression of your video, so it’s crucial to make it unique and high-quality.
Don’t let viewers scroll past your content – learn how to craft great thumbnails for your YouTube videos with our guide, including tips on using Canva.
1. Access Canva Thumbnail Maker
To create a thumbnail, you should use an image editing tool, thumbnail maker. You can choose one of the thumbnail makers according to your expectations, budget, and skills.
Canva has many design elements like color schemes, photo effects, and fonts. It is one of the best design tools. Now, you can create eye-catching YouTube thumbnails with Canva, one of the best YouTube thumbnail makers.
Go to the Canva website, open the app, and log into your account. If you don’t have an account, sign up and create a Canva account.
2. Find a Template for Your Thumbnail in Canva

After logging into Canva to search for a template, write “YouTube thumbnail” into the search bar. Then, you will see various results. You can filter your results by searching with more specific keywords like “YouTube thumbnails about DIY”, “YouTube thumbnails about gaming”, etc.
3. Customize Your Thumbnail
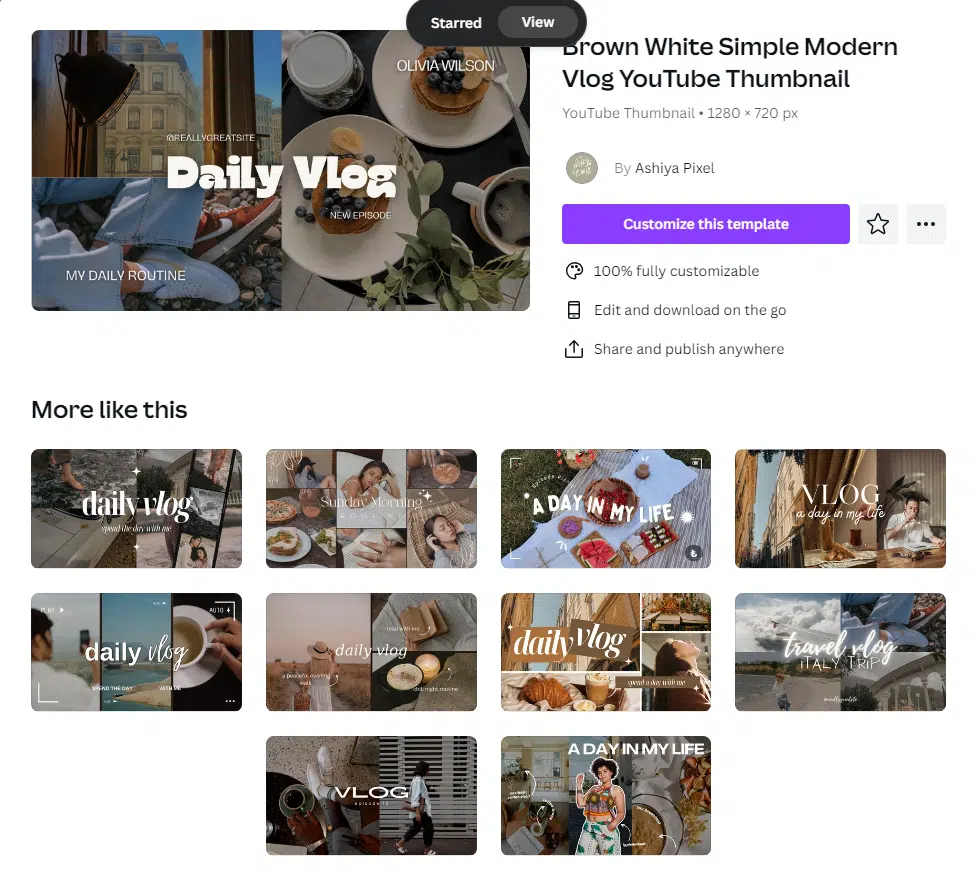
Please select the right thumbnail; it is time to customize it. When you click on the desired thumbnail template, a larger version will be displayed, and you will see some details about it. You can save it to your favorites or share it with other people.
Click the “Customize this template” button and are directed to the Canva Editor.
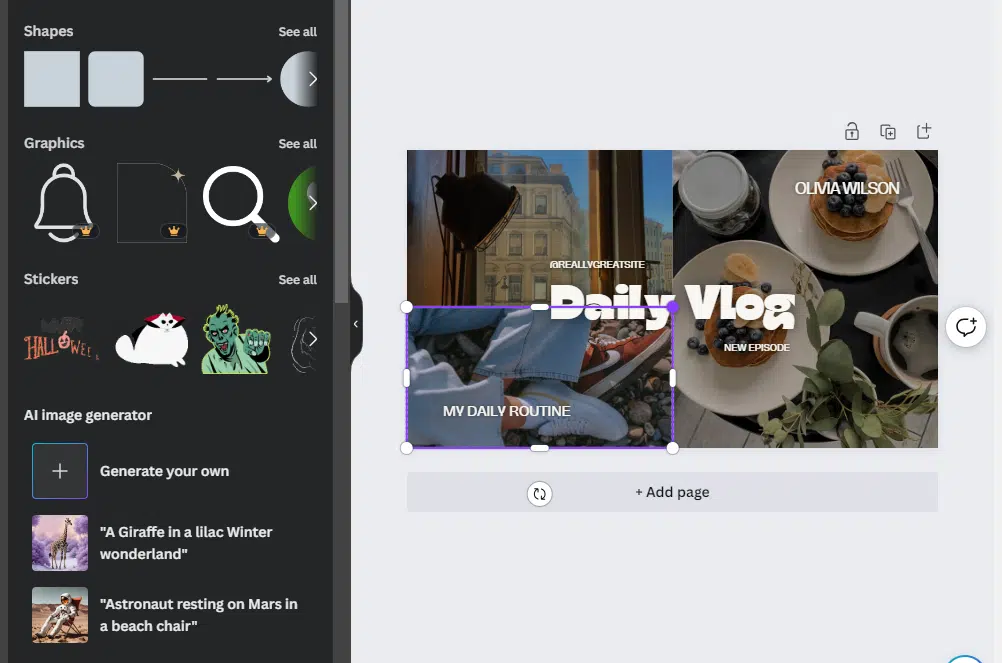
Now, you can use design tools and stock images provided for you to adjust the template.
Three tabs are essential:
- Uploads: graphics that you uploaded to Canva
- Elements: stock images
- Thumbnail Text: fonts and other options for text
From my own experience using Canva to create YouTube thumbnails, I can vouch for its efficiency and user-friendliness. I’ve found that the vast array of templates and design elements Canva offers makes it incredibly easy to start with a solid foundation. In particular, the ability to experiment with different font styles and colors has allowed me to create thumbnails that not only look professional but also stand out in the crowded YouTube space.
4. Use the Uploads Section to Add Images
From the uploads section, you can add any image or photo of yours according to your liking. You can quickly change the size of an element by clicking on it, extending it, or contracting it to make it fit your needs.
5. Utilize Elements Section

The elements section has many stock photos, shapes, stickers, graphics, and collections. There are a lot of options to make YouTube thumbnails without much effort. Nearly everything is ready. You need the ones you want to use in your thumbnail.
6. Work on Your Thumbnail
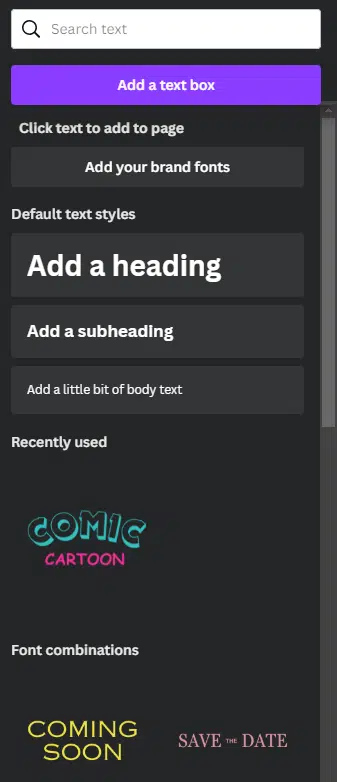
Your YouTube thumbnails should indeed be visually appealing, but furthermore, it would be better if your video thumbnails included text. They provide the context. You can add any element that you think will fit your video thumbnail.
- Consider the thumbnail’s size and add text according to that. A good YouTube thumbnail should be easy to read as well as eye-catching.
- You can add numbers to your video thumbnails if you have a video series.
- Now, you can design the appearance of your text. You can create a color contrast between the background image and text.
7. Add Headshots to Your YouTube Thumbnails
To add a headshot, drag your headshot onto the thumbnail. Then click on your headshot image and click the “Edit Image” button at the left corner.
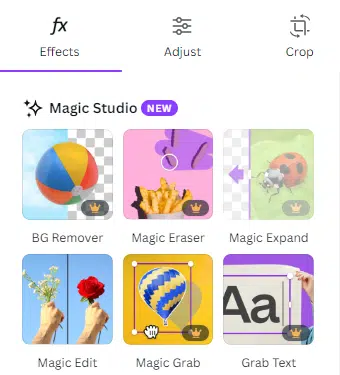
Select the “Background Remover”. This will remove the background.
8. Download it to Your Desktop
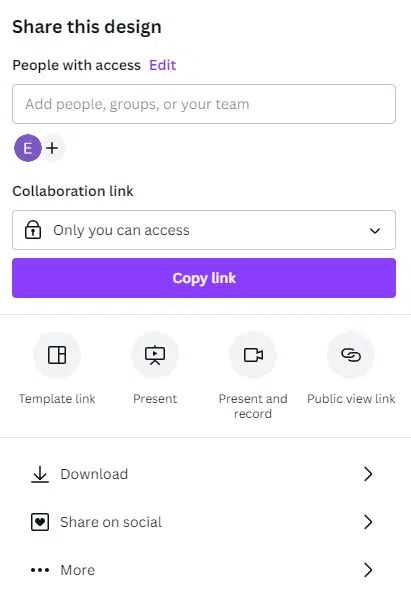
Now, you can download your work to your desktop to upload to your YouTube channel. Go to the “Share” button at the top-right corner to download. Next, click on “Download”.
YouTube recommends PNG, JPG, or GIF, so choose the correct format and download it.
If you were wondering how to make a YouTube thumbnail, that is how easy it is.
FAQ
What Are Some Tips to Create YouTube Thumbnails?
Here are our tips for you to create a YouTube thumbnail:
Try to Benefit from Headshots
Keep up With Thumbnail Trends
Use Matching Colors
Use High-Quality Images
Close-Up Images Works Better
Choose a Thumbnail That Accurately Representing You Video
How Many Custom Thumbnails Can a Channel Upload at One Time?
If you exceed the limit, you will see an error “Daily custom thumbnail limit reached”. Try again in 24 hours in that case. The limit can vary by your country or your channel history.
What Are the Requirements for a YouTube Thumbnail?
There are some things you should pay attention to:
Make sure that you use 1280 x 720 pixels.
The minimum width is 640 pixels.
The formats you can use are JPEG, GIF, and PNG.
The aspect ratio should be 16 to 9.
The limit is two megabytes.

Comments